1. 글의 목적
마인크래프트 BE 서버 '바니팜'의 아이템 거래/교환소를 웹으로 구현하고 있습니다.
거래 기능을 만들기 위해서는 사용자의 마인크래프트 계정을 식별해야 했고,
이를 위해 Xbox Live의 Gamertag 정보를 가져올 필요가 있었습니다.
Gamertag을 얻기 위해 Microsoft OAuth 이후 Xbox Live 인증 과정을 구현해보았습니다.
2. 사용한 기술 스택
nextjs: 16.1.6 (app router)
typescript: ^5
supabase/ssr: ^0.9.0
3. Xbox 인증 구조
Microsoft OAuth
   ↓
Access Token
   ↓
Xbox Live Token
   ↓
XSTS Token
   ↓
Xbox API 호출
4. 구현전 해야할 일
이 단계에서 필요한 값은 다음 두 가지입니다.
- Application (Client) ID
- Client Secret
https://portal.azure.com/#home 에 들어가서 가입(가입을 안했다면)후 로그인을 한다.

이후 검색창에 Microsoft Entra ID을 검색후 들어간다.
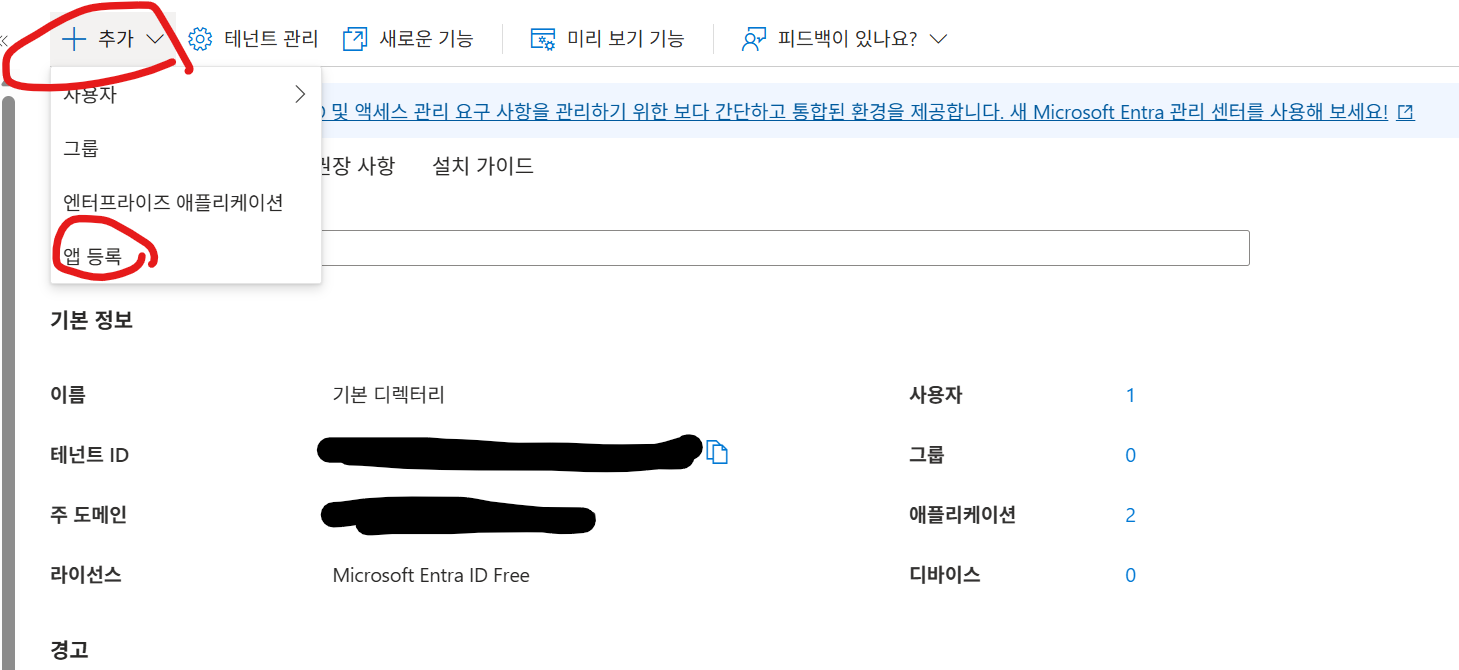
추가-앱등록 버튼을 누른다.
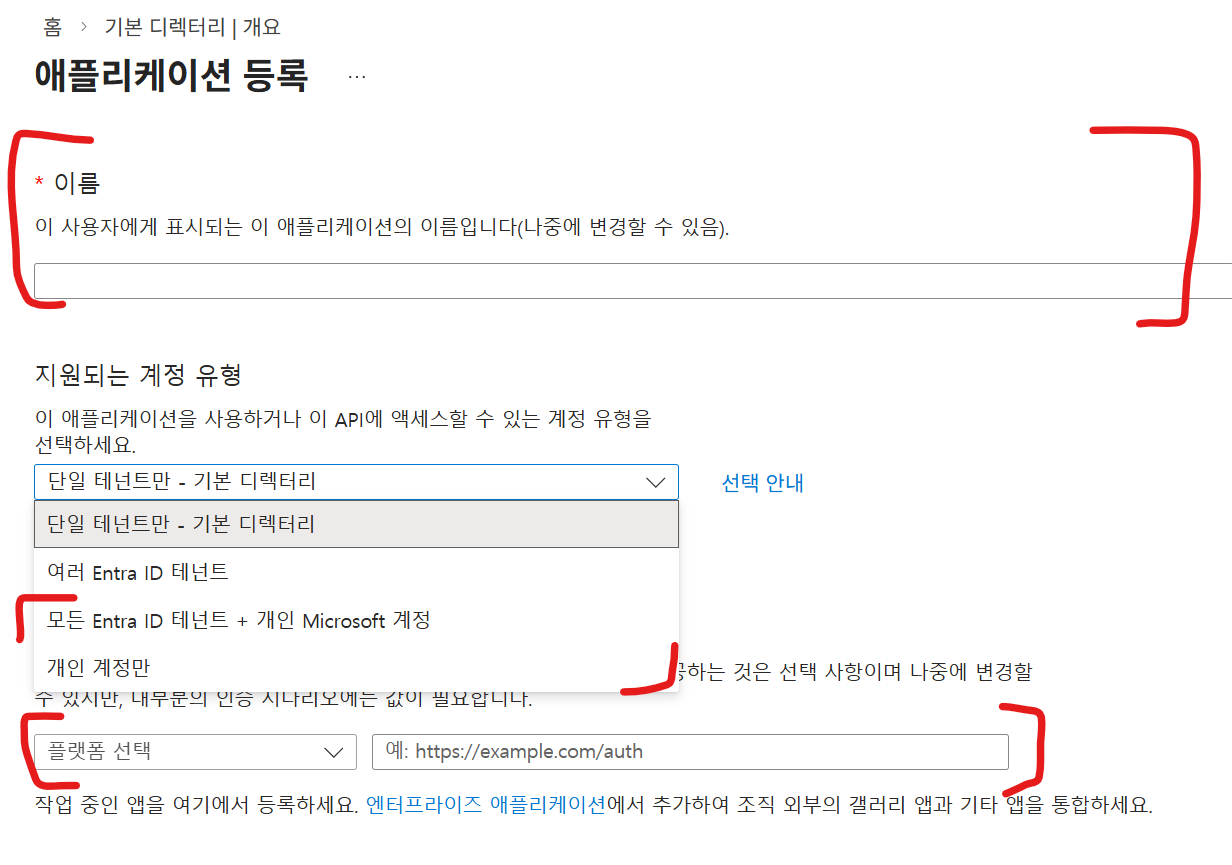
앱 이름을 작성하고 지원되는 계정 유형에는 "모든 Entra ID 태넌트 + 개인 Microsoft 계정" 또는 "개인 계정만"을 선택하고
리디렉션 URI에는 플랫폼 유형은 "웹" 주소는 "http://localhost:3000/api/auth/xbox"를 추가한다. (서비스 운영시 서비스의 도메인도 넣어줘야 한다.)

이후 기본 정보가 뜰텐데 애플리케이션(클라이언트) ID부분은 복사하여 저장해둔뒤 "인증서 또는 비밀 추가"를 클릭한다.

"새 클리이언트 암호"를 클릭후 만료시간을 적절히 선택후 추가 버튼을 누른다.

이후 나오는 "값" 부분의 내용을 잘 기록해둔다. 창 나가면 다시는 안보여주니 꼭 기록하기!
5. 구현
// /app/page.tsx
"use client";

import { supabase } from "./supabaseClient";
import { useState, useEffect } from "react";
import { redirect } from "next/navigation";
import { getXboxAuthUrl } from "./lib/xboxAuth";

export default function Home() {
  const [session, setSession] = useState<any>(null);
  const [isNewUser, setIsNewUser] = useState(false);
  const [profile, setProfile] = useState<any>(null);

  useEffect(() => {
    if (!session) return;

    const f = async () => {
      const {data, error} = await supabase.from('profile').select('*').eq('id', session.user.id).maybeSingle();
      if (error) return;
      if (!data) {
        setIsNewUser(true);
      } else {
        setProfile(data);
      }
    };
    f();

  },[session]);

  const handleXboxLogin = async () => {
    const authorizeUrl = getXboxAuthUrl({
      clientId: '<your ms entra app client-id>',
      redirectUri: `${window.location.origin}/api/auth/xbox`
    });
    redirect(authorizeUrl);
  }


  useEffect(() => {
    supabase.auth.getSession().then(({ data: { session } }) => {
      setSession(session);
    });

    const {
      data: { subscription },
    } = supabase.auth.onAuthStateChange((_event, session) => {
      setSession(session);
    });

    return () => subscription.unsubscribe();
  }, [supabase.auth]);

  const handleLogin = async () => {
    await supabase.auth.signInWithOAuth({
      provider: "google",
      options: {
        redirectTo: `${window.location.origin}/api/auth/callback`,
      },
    });
  };

  const handleLogout = async () => {
    await supabase.auth.signOut();
  };

  return (
    <div className="flex min-h-screen flex-col items-center justify-center p-24">
      <h1 className="text-4xl font-bold mb-8">google Login Test</h1>

      {session ? (
        <div className="flex flex-col items-center gap-4 w-full max-w-2xl">
          <p className="text-xl">Logged in as: {session.user?.email}</p>
          {profile && (
            <div className="p-4 bg-gray-100 text-black dark:text-white dark:bg-gray-800 rounded-md w-full overflow-auto">
              <h2 className="font-bold mb-2">Profile Data:</h2>
              <pre className="text-xs">{JSON.stringify(profile, null, 2)}</pre>
            </div>
          )}
          <div className="p-4 bg-gray-100 text-black dark:text-white dark:bg-gray-800 rounded-md w-full overflow-auto">
            <h2 className="font-bold mb-2">Session Data:</h2>
            <pre className="text-xs">{JSON.stringify(session, null, 2)}</pre>
          </div>
          <button
            onClick={handleLogout}
            className="px-4 py-2 mt-4 bg-red-600 text-white rounded hover:bg-red-700 transition-colors"
          >
            Sign Out
          </button>
          {isNewUser && (
            <button
              onClick={handleXboxLogin}
              className="px-6 py-3 mt-4 bg-[#107C10] text-white rounded-lg font-semibold hover:bg-[#0b580b] transition-colors flex items-center justify-center gap-2 shadow-lg"
            >
              Xbox 계정 연결하기
            </button>
          )}
        </div>
      ) : (
        <button
          onClick={handleLogin}
          className="px-6 py-3 bg-[#107C10] text-white rounded-lg font-semibold hover:bg-[#0b580b] transition-colors flex items-center gap-2 shadow-lg"
        >
          Sign in with Google
        </button>
      )}
    </div>
  );
}
간단하게 supabase의 구글 oauth를 이용해서 유저정보를 미리 저장해둔후, 만약 xbox계정이 연결이 안되어 있으면 xbox계정을 연동 할 수 있게 했습니다.
supabase + 구글 oauth에 대해서는 https://jtw7977.tistory.com/8 글을 참고 해주십시오.
아무튼 로그인을 했지만 xbox계정이 로그인이 안되어 있으면 isNewUser가 true가 되고 Xbox계정 연결하기 버튼이 추가된다.
누르면
const handleXboxLogin = async () => {
    const authorizeUrl = getXboxAuthUrl({
      clientId: '<your ms entra app client-id>',
      redirectUri: `${window.location.origin}/api/auth/xbox`
    });
    redirect(authorizeUrl);
  }
이 호출될건데, getXboxAuthUrl 함수는 다음과 같이 정의되어 있다:
function getXboxAuthUrl({clientId, redirectUri}: {clientId: string, redirectUri: string}) {
    return `https://login.live.com/oauth20_authorize.srf?client_id=${clientId}&response_type=code&redirect_uri=${encodeURIComponent(redirectUri)}&scope=XboxLive.signin%20XboxLive.offline_access`;
}
부분에는 4번에서 얻었던 애플리케이션(클라이언트) ID값을 넣어주면 된다.
아무튼 저 uri가 함수로 반환되고 리다이액트가 되면 유저는 접근 권한을 확인하고 동의를 누르게 되면 함수 인자로 넣었던 리다이액트uri로 리다이액트가 된다.
// /app/api/auth/xbox/route.ts
import { NextResponse, NextRequest } from 'next/server';
import { createSupabaseServerClient } from '../../../supabaseServer';
import { XboxAuth } from '../../../lib/xboxAuth';

export async function GET(request: NextRequest) {
    const { searchParams } = new URL(request.url);
    const code = searchParams.get('code');

    if (!code) {
        return NextResponse.json({ error: 'Missing code' }, { status: 400 });
    }

    const xboxAuth = new XboxAuth(
        '<your ms entra app client-id>',
        `${request.nextUrl.origin}/api/auth/xbox`,
        process.env.XBOX_CLIENT_SECRET!
    );

    const data = await xboxAuth.xboxLogin(code);

    const supabase = await createSupabaseServerClient();

    const {
        data: { user },
        error,
    } = await supabase.auth.getUser()
    if (error || !user) {
        return NextResponse.json({ error: 'User not authenticated' }, { status: 401 });
    }

    const {data: data2, error: error2} = await supabase.from('profile').upsert({
        id: user.id,
        xuid: data.xstsToken.DisplayClaims.xui[0].xid,
        xbox_user_tag: data.xstsToken.DisplayClaims.xui[0].gtg,
    })

    if (error2) {
        console.error("Failed to update profile:", error2);
        return NextResponse.json({ error: 'Failed to update profile' }, { status: 500 });
    }


    return NextResponse.redirect(`${request.nextUrl.origin}/`);
}
/api/auth/xbox 는 이렇게 구성이 되어 있다. xboxAuth.xboxLogin함수가 어떤 역할을 하는지 알아보자.
class XboxAuth {
    clientId: string;
    redirectUri: string;
    clientSecret: string;

    constructor(clientId: string, redirectUri: string, clientSecret: string) {
        this.clientId = clientId;
        this.redirectUri = redirectUri;
        this.clientSecret = clientSecret;
    }

    async getOauthToken(code: string) {
        const res = await fetch("https://login.live.com/oauth20_token.srf",{
            method: "POST",
            headers: {
                "Content-Type": "application/x-www-form-urlencoded"
            },
            body: `client_id=${this.clientId}&code=${code}&client_secret=${this.clientSecret}&grant_type=authorization_code&redirect_uri=${encodeURIComponent(this.redirectUri)}`
        });
        return await res.json() as oauthTokenResponse;
    }

    async getXboxLiveToken(accessToken: string) {
        const res = await fetch("https://user.auth.xboxlive.com/user/authenticate", {
            method: "POST",
            body: JSON.stringify({
                "Properties": {
                    "AuthMethod": "RPS",
                    "SiteName": "user.auth.xboxlive.com",
                    "RpsTicket": `d=${accessToken}`
                },
                "RelyingParty": "http://auth.xboxlive.com",
                "TokenType": "JWT"
            })
        });
        return await res.json() as xboxLiveAuthResponse;
    }

    async getXstsToken(userToken: string) {
        const resXsts = await fetch("https://xsts.auth.xboxlive.com/xsts/authorize", {
            method: "POST",
            headers: {
                "Content-Type": "application/json",
                "Accept": "application/json"
            },
            body: JSON.stringify({
                "Properties": {
                    "SandboxId": "RETAIL",
                    "UserTokens": [userToken]
                },
                "RelyingParty": "http://xboxlive.com",
                "TokenType": "JWT"
            })
        });
        return await resXsts.json() as xstsAuthResponse;
    }

    async getXboxProfile(xstsToken: string, uhs: string, settings: string[] = ["Gamertag"]) {
        const res = await fetch(`https://profile.xboxlive.com/users/me/profile/settings?settings=${settings.join(',')}`, {
            method: "GET",
            headers: {
                "Authorization": `XBL3.0 x=${uhs};${xstsToken}`,
                "x-xbl-contract-version": "2",
                "Accept": "application/json"
            },

        });
        return await res.json() as xboxProfileResponse;
    }

    async xboxLogin(code: string) {
        const oauthToken = await this.getOauthToken(code);
        const xboxLiveToken = await this.getXboxLiveToken(oauthToken.access_token);
        const xstsToken = await this.getXstsToken(xboxLiveToken.Token);
        return { oauthToken, xboxLiveToken, xstsToken };
    }

}
1. 먼저 리다이액트로 넣어준 code을 OauthToken으로 교환한다.
2. 얻은 OauthToken을 xboxLiveToken으로 교환한다.
3. 얻은 xboxLiveToken을 xstsToken으로 교환한다.
그러면 인증이 완료되고 필요에 따라 xboxlive api를 이용할 수 있다.
이렇게 구현이 끝났다.
export type oauthTokenResponse = {
    token_type: string;
    expires_in: number;
    scope: string;
    access_token: string;
    refresh_token: string;
    user_id: string;
}

export type xboxLiveAuthResponse = {
    IssueInstant: string;
    NotAfter: string;
    Token: string;
    DisplayClaims: {
        xui: Array<{
            uhs: string;
        }>
    }
}

export type xstsAuthResponse = {
    IssueInstant: string;
    NotAfter: string;
    Token: string;
    DisplayClaims: {
        xui: Array<{
            gtg: string;
            xid: string;
            uhs: string;
            usr: string;
            utr: string;
            prv: string;
            agg: string;
            ugc: string;
        }>
    }
}

export type xboxProfileResponse = {
    profileUsers: Array<{
        id: string;
        hostId: string;
        settings: Array<{
            id: string;
            vaule: string;
        }>;
        isSponsoredUser: boolean;
    }>
}
타입 정의는 다음과 같다.
6. 마무리&느낀점
처음에는 azure oauth로 xbox까지 다 되는줄 알았다. 이것때문에 몇시간을 삽질했다....
별도로 인증 워크플로우를 구현해야함을 늦게 알았고 처음 부터 차근차근 구현해보았다.
한국어 자료가 거의 없어 구현 과정이 쉽지 않았지만
인증 구조를 이해하면서 구현하니 꽤 흥미로운 경험이었다.
'프로그래밍 > 개발 일지' 카테고리의 다른 글
| 그때 나는 몰랐다 — EP.01 (0) | 2026.06.03 |
|---|---|
| 그때 나는 몰랐다 — EP.00 프롤로그 (0) | 2026.06.01 |
| [CD/CI] blue-green 배포 공부해보기 2 (1) | 2026.01.14 |
| [CD/CI] blue-green 배포 공부해보기 1 (0) | 2026.01.13 |
| [Electron + Vite] 환경 설정과 트러블슈팅 가이드 (7) | 2025.08.11 |